My Bird Quilt - Part 1
European Garden Bird Quilt
I have been working on a bird quilt for over a year now. My oldest son got us into bird watching when we lived in Ireland. I became obsessed with the little garden birds that used to frolic, play and twitter down the country lane where we lived. It was so exciting to catch that flash of pinky peach and see a fat little bullfinch, or the bright green of the greenfinches. So, even though we moved back to Australia a few years ago, I wanted to pay homage to these gorgeous little European birds and create a large wall-hanging quilt.
My process started by researching each bird and sketching a drawing of each in my sketch book. Using that sketch, I transferred the design to my iPad where I used the Procreate App to draw and finalise each bird design (by the way, Procreate is an amazing app if you want to try digital art!!).
Before I transferred my designs, I prepared my fabric. I cut out 9 inch squares of plain calico and hand painted each one with different watercolour paints (mixed with textile medium to stop them fading). I then printed out each bird design onto paper and traced them with a transfer pencil onto tracing paper. When you iron this paper onto your fabric, it transfers your design permanently onto the fabric.
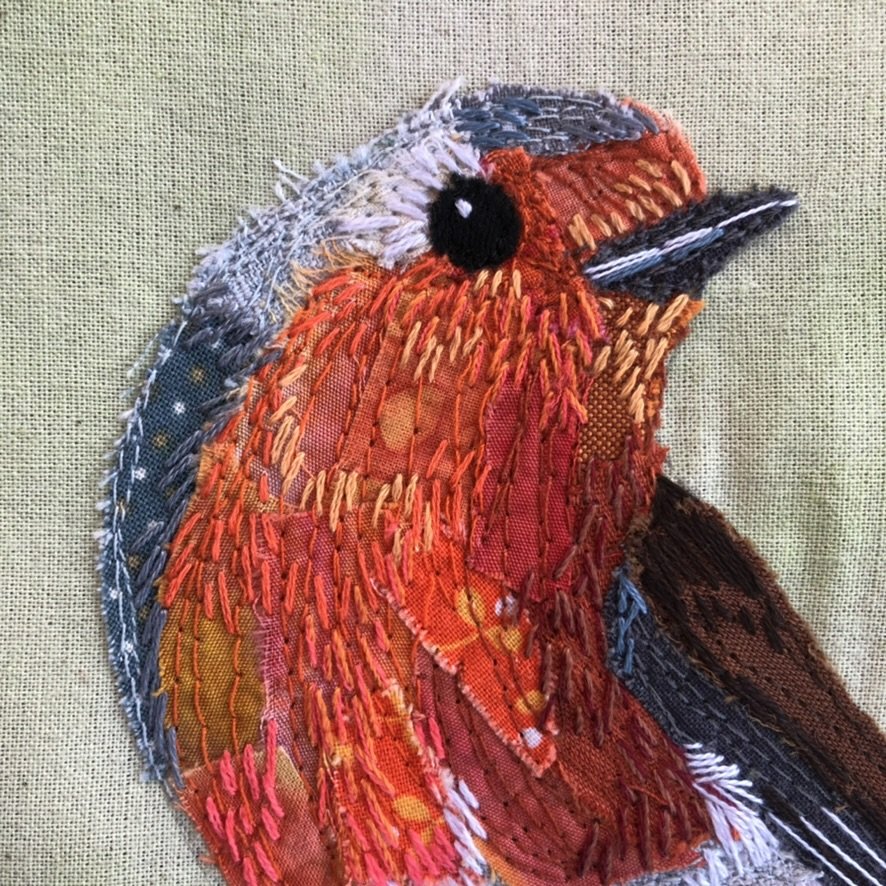
My favourite step is making the bird collage! Using photos and my sketch for reference, I get out my tiny fabric scraps (colour sorted) and start layering my design. I often glue as I go but I never put too much glue down in case I want to move things around and change them. Once my collages were completed, I used my sewing machine to free-motion embroider the main details of each bird using matching colours. I then spent a lot of time embellishing the details with hand embroidery.
I don’t always plan my whole piece before I start. I am one of those impatient people that get an idea and throw myself in!! So I had no idea how I was going to piece my quilt together. I researched quilts and borders and decided I wanted a collage of trees behind the birds. Again I used Procreate to draw up my entire design which I transferred to Photoshop on my computer to cut into sections ready for printing.
I will share the next steps of my process in another blog post as it has been a big learning experience for me! Hope my process has inspired you to try something like this for yourself. I am hoping to make my bird quilt into a pattern once it is finally finished!


